How to Use Double-Point Alignment
Protractors
any older
tonearms used double-point protractors that require a slightly different approach to
single-point devices. These are not referenced to the tonearm pivot but to the two
different grids on the protractor itself. Here are step-by-step instructions for our
preferred approach to optimizing alignment with these tools.
Immobilize the
platter to stop it turning, using a small rubber wedge or a blob of Blu-Tack or similar,
if you haven’t done so already. Likewise, ensure that the bias adjustment is set to
zero.
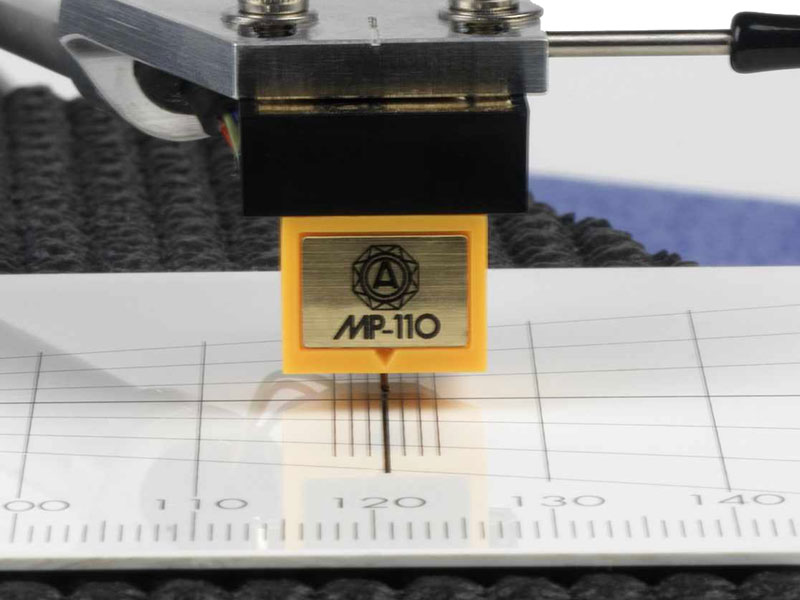
Place the
protractor over the spindle and place the outer grid (farthest from the spindle) so that
the stylus drops onto it. Now, adjust the position of the cartridge so that the cantilever
is parallel to the grid on the protractor and parallel to the slots in the
headshell (Note: the cantilever parallel to the slots, not the cartridge
body parallel to the slots).
Hint: If the
cantilever tip is pointing toward the center of the record, then the cartridge needs to
move toward the front of the slots. If it is pointing away, it needs to move back.
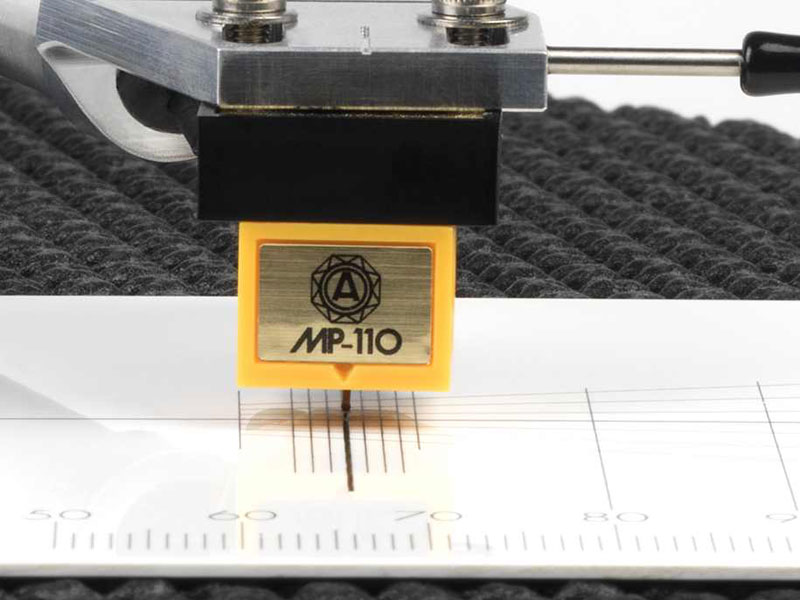
Once you have the
cartridge aligned so that the tip is at the center of the grid and the cantilever is
parallel with both the slots and the longitudinal lines on the grid, swap it to the inner
grid. This will mean lifting the 'arm and then (generally) rotating the protractor
clockwise on the platter.
Just as above, if
the cantilever tip in the new position is pointing toward the center of the record, then
the cartridge needs to move toward the front of the slots. If it is pointing away, it
needs to move back. Don’t adjust it yet! First return to the outer grid, move the
cartridge as indicated and recheck on the inner grid. Keep going until the cantilever is
parallel/parallel in both positions. Each time you swap grids, you will have to reposition
the protractor and as you adjust the cartridge you will gradually reduce the alignment
error. The key is to make sure that you have the cartridge precisely on the center of the
grid each time. Eventually you will achieve a position such that the cantilever is
perfectly parallel in both the inner and outer grid positions.
Once you have the
cartridge positioned, recheck the downforce and adjust.
Recheck the 'arm
height and adjust if necessary.
Recheck the
alignment to make sure that it is still good, and repeat the whole process if
necessary.
Finally, set the
bias force. This counteracts the tendency of the curved groove wall to push the cartridge
towards the center of the record, thus keeping the cantilever centered above the groove.
The starting point for this is a value equal to the tracking
force, although many bias systems are uncalibrated, relying on magnetic forces, falling
weight or springs/dials. In either case, the way to check the setting is by watching the
stylus settle into the groove from the front. With the platter turning, use the cueing
device to drop the stylus halfway across the record. The cartridge should settle dead
straight, smoothly, without wobbling or lurching inward or outward. If it moves out,
increase the bias and vice versa if it moves in. If in doubt, tend towards lower bias
values as they generally sound better.
If all this sounds
like an endless round of set, check, set and check again -- that’s because it is.
Setting up a cartridge really isn’t difficult, especially if you make sure you have
all the tools and sufficient light before you start. What it is, is repetitive and
painstaking. The more careful you are, the better the results and the better your record
player will sound.
|