Trouble Comes A-Knockin': The Untold Story of One Review
Many a reader entertains romantic notions about reviews and reviewing; it must be great to have the latest, greatest (and most expensive) amp, preamp, CD player or speakers (delete as appropriate) arrive on your doorstep, free of charge. All you need to do is drop it into your system, compare it to your "reference" unit and pen a few pithy observations. Well, not exactly. That ignores the issues of storage (the boxes have to go somewhere), compatibility, warm-up and burn-in, optimization and accommodation (the small matter of rack space and extra cabling) -- all of which are purely practical concerns. Not too bad if you are talking about a nice, compact DAC or line stage -- but how about a pair of monster speakers or a four-box digital front-end? Suddenly life isn’t quite so simple -- at least not if you are married and want to stay that way! And that’s before you start to draw any sort of sonic or musical conclusions, or calculate your hourly rate, once you add up the time expended compared to the fee received. Of course, you can curtail your time expended, but then that directly impacts the quality of your conclusions. By way of an example, let’s take a look at a recent manufacturer visit, preparatory to a review on a product line that many people would consider accessories. This is not the review proper; this is just the introduction to the product that allows me to formulate the approach I’ll actually take to the review itself. Yes, the experience here informs the review, but each element will have to be repeated and revisited in the context of different equipment, systems and situations. The object of this exercise is just to get a handle on the landscape and establish the route I’ll be taking across it. Dramatis personae
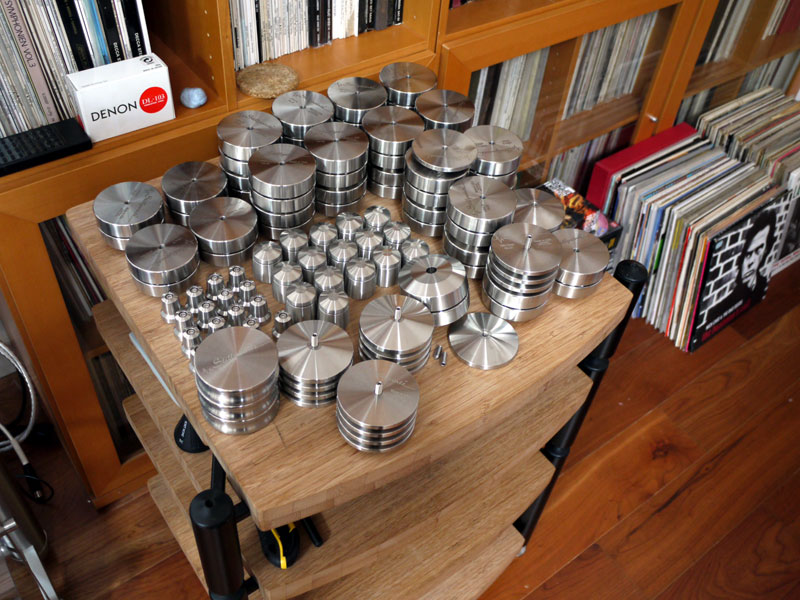
he product line in question is the Stillpoints family of equipment-support solutions. In essence, this consists of three "feet" (the Stillpoints Ultra Mini, Ultra SS and Ultra 5) along with the ESS equipment rack. You might assume that makes things pretty straightforward -- just compare the three Ultras in order of price, and compare the rack to a suitable alternative -- but in practice the questions posed are a lot more complex.
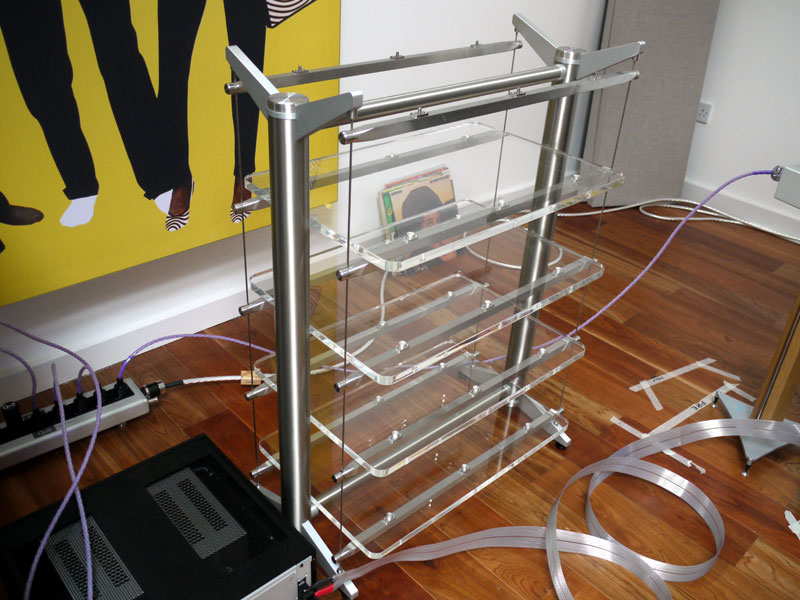
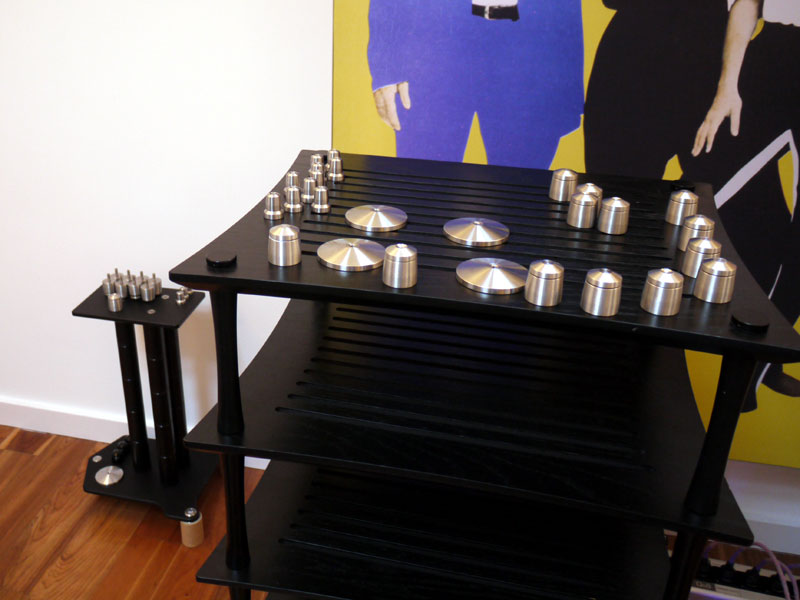
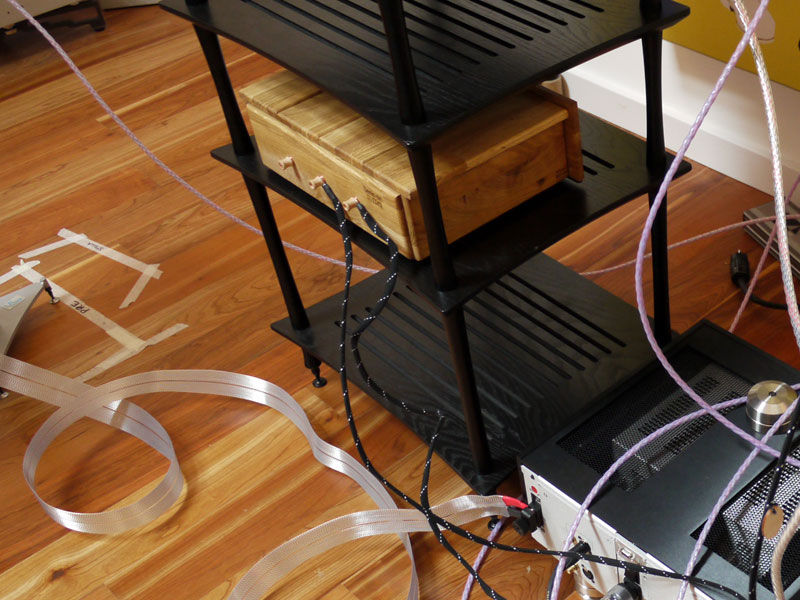
Just a few of the Stillpoints products awaiting installation. Conceptually, the Stillpoints should be considered a support system, so this isn’t just a case of stick the feet under your CD player and see what happens. Instead, if the final review is actually going to be useful in helping readers understand, apply and assess this product in their own system context, I need to consider the following questions:
These are a lot of questions to answer, and unless I adopt a seriously structured approach it will be extremely hard to provide any kind of informed response. First and foremost, I need to have enough product to try every permutation, and that means being able to lift the system from end to end on each type of support, from the Ultra Minis to the ESS rack. That is the same rule I apply to cables or any other product that deals with system infrastructure. Of course, I can reduce this requirement somewhat by running a simplified system, but even so I’ll still need an awful lot of Stillpoints -- as well as the time and patience to apply them in a systematic and carefully programmed manner. With that in mind, Paul Wakeen of Stillpoints arranged to visit, along with Fraser Robertson, his UK distributor, to provide the product, the pertinent details, the benefit of his own experience in the field -- and to help with the heavy lifting. Oh, yes -- I forgot that part. Just running this many changes to the stuff sitting under a high-end system constitutes a serious physical workout in itself!
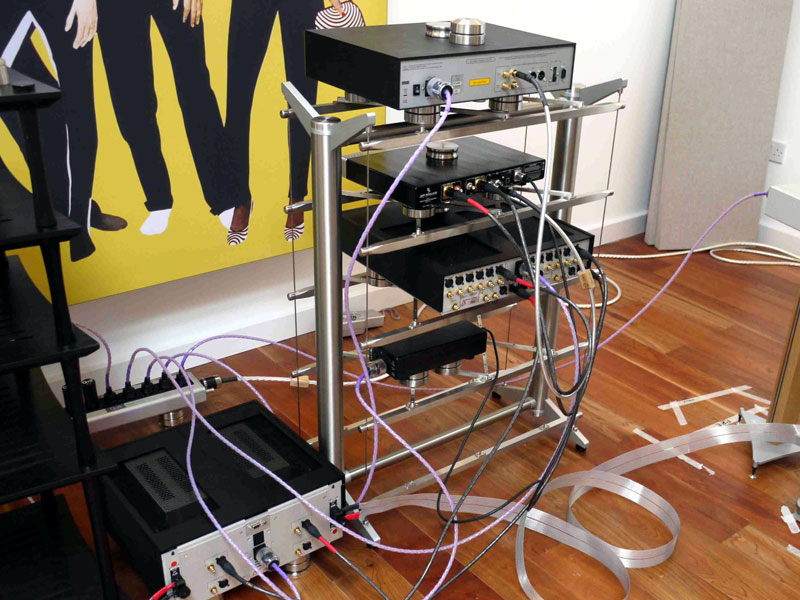
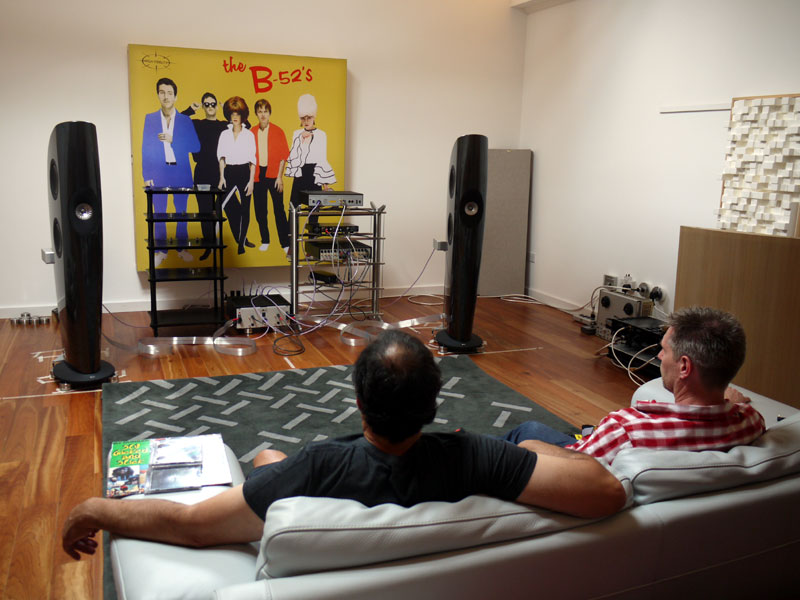
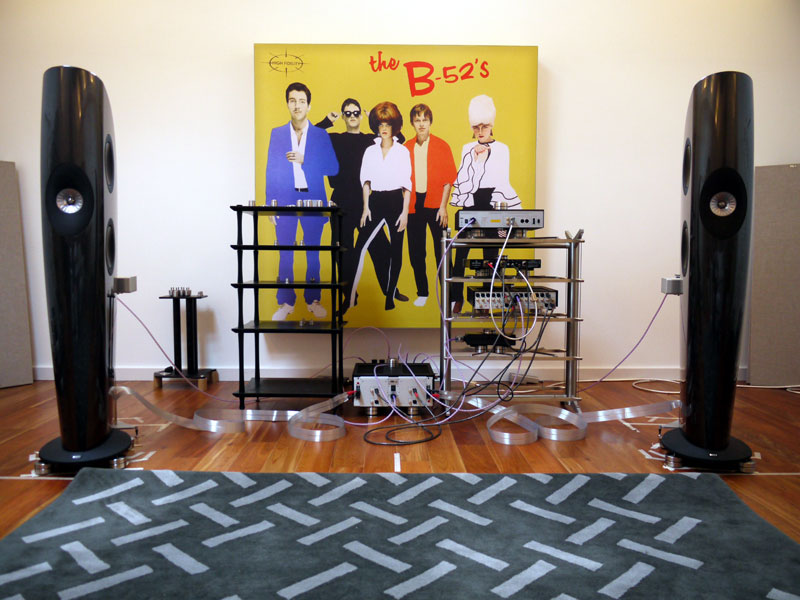
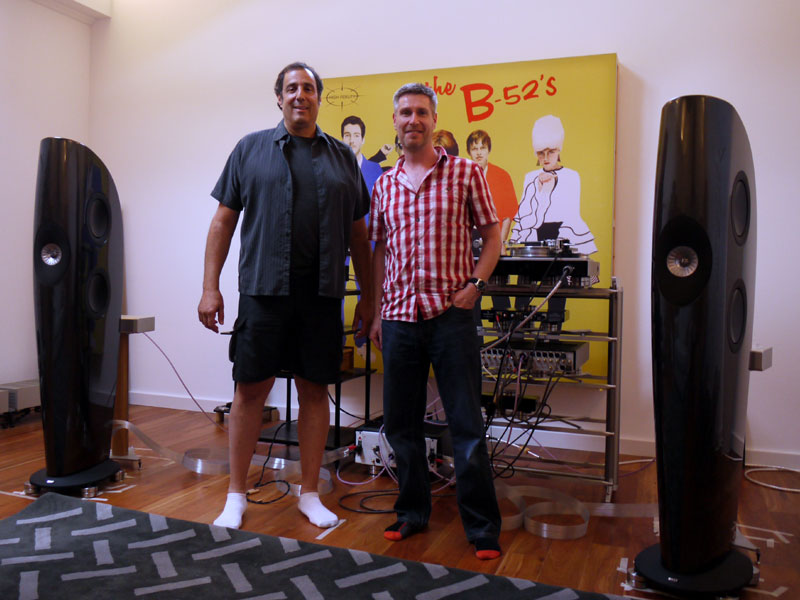
The initial setup, all ready and waiting. First things first
efore Paul and Fraser arrived, there was some considerable preparation to do. The product itself needed to be delivered, unpacked and checked. That takes a surprising amount of time. In addition, because we were going to use a "reduced" system, capable of being supported on a single rack (thus ensuring a total system solution), I needed to remove the ESS rack I use every day from the main system, and set it up, along with a Quadraspire SVT, between the speakers. Then I had to select and install the system we’d be working on. For the purposes of this exercise I chose the following equipment:
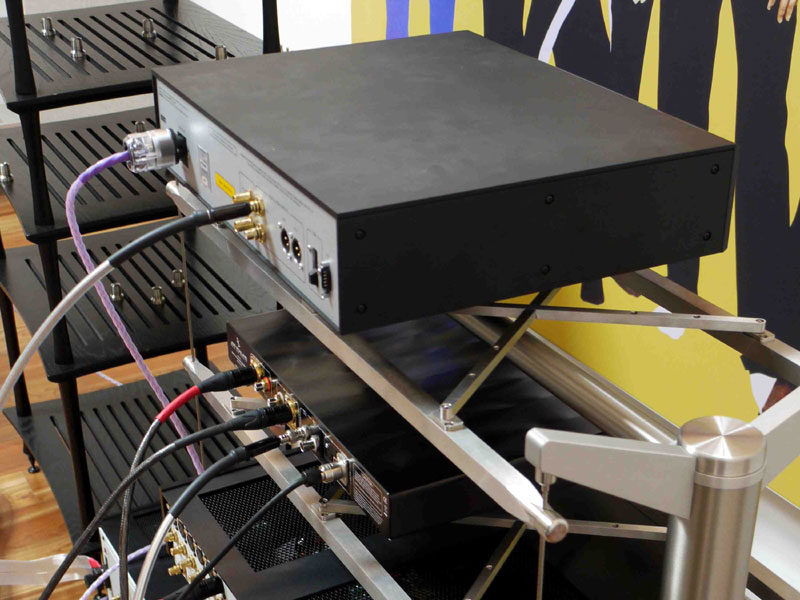
The whole system was wired via a Quantum QB8 with a mix of Nordost Vishnu power cords and Tyr 2 interconnects and speaker cables. I also used a pair of Quantum Qv2 units in the power line, and a pair of Qx4 units behind the speakers -- standard arrangements in my main system. The QB8 was fed with an Odin power cord, and an Odin digital lead was used between the transport and DAC, as otherwise I didn’t have cables of the appropriate type or length -- and total cold turkey is not a pretty thing! An entire Odin loom might be considered distorting in the context of this exercise ("You only get that result if you use those cables!"), so I deliberately kept to something rather more modest. The purpose behind the inclusion of the Quantum components will become clear later. The system itself was installed backwards in the racks, allowing it to be moved from one rack to the other without disconnecting the cables. In itself, that requires some planning when it comes to arranging the various wires, plans that fly in the face of proper cable dressing, but needs must. The power amp was placed centrally, on the floor between the racks, partly because such a placement isn’t unusual, partly because moving the amp from one rack to the other would have been a serious struggle. The Atlas is one heavy mutha. I also used five-shelf racks, partly to allow us to install the power amp (if we ever felt brave enough, partly to provide an extra shelf in the ESS, allowing us to change the shelf structure beneath the equipment to Stillpoints' new Grid support arrangement one unit at a time. Why did I choose those electronics? Because I wanted to be able to look at as many equipment types/configurations as possible. The simplest solution would have been an integrated CD player and an integrated amp, or even the Wadia S7i driving the Atlas direct, but if you are thinking in system terms, the bigger and more complex the system, the greater should be the apparent benefit; it should be easier to assess the virtues of an approach that is supporting five boxes rather than two. Also, the units themselves ring the changes by separating the transport and DAC functions, providing a separate outboard power supply (on the Aeris), an all-tube preamp, a hybrid power amp and not forgetting a dedicated power-distribution strip. Thus, the system was chosen specifically to investigate the impact of the products on the system as a whole as well as the priorities within that system and impact of different topologies on the effectiveness of the supports. Time to get down. . .
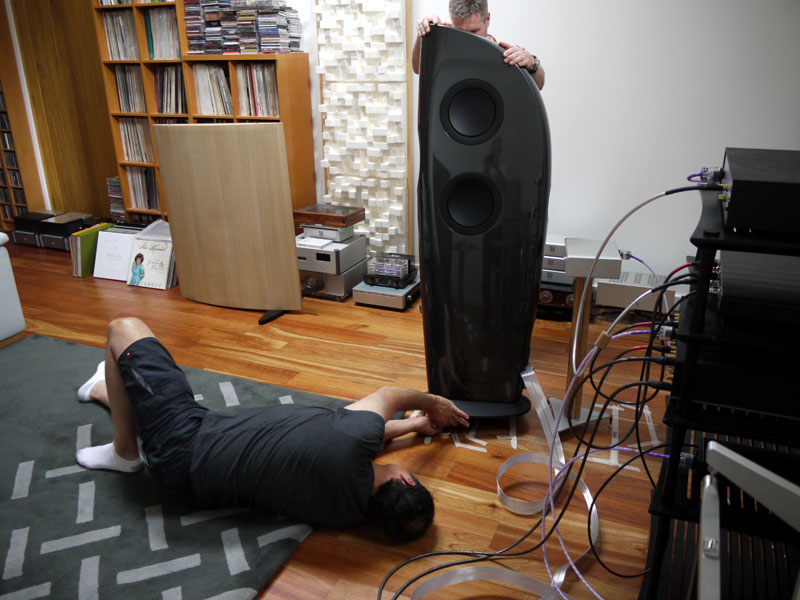
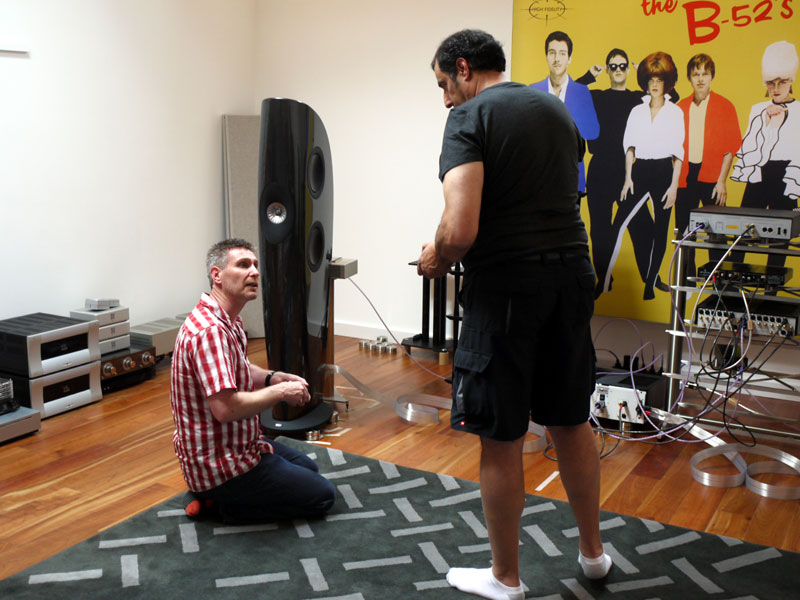
ith the system in place, allowed to settle and warmed up for 24 hours, it was time for Paul and Fraser to turn up and for the listening to start in earnest. Having already discussed the plans in detail on the phone, everybody knew what to expect -- with only one question remaining: where exactly to start? Paul's advice was to start with the speakers, but that means two sets of four feet, Ultra SS in the case of the Blades, as the Minis won’t take the weight or the threads required for attachment to the speakers’ plinths. So the first order of business was to start by inserting two sets of Ultra SS feet under the transport and DAC -- before screwing them onto the bottom of the speakers, just to check Paul’s proposition. There was no doubting the results; clearly, applying the feet to the speakers doesn’t just improve their performance, it opens the window on system performance, allowing you to hear each subsequent benefit much more clearly.
Getting down -- and getting dirty: installing and Ultra SS on the KEF Blade.
Next step was to try a trio of Minis under each element of the system in turn (barring the power amp, again for weight reasons). That’s ABA listening on five different components -- don’t forget the power strip -- or eleven listening tests without repetitions! Fortunately the differences in question are sufficiently stark to make multiple repeats unnecessary, although a few loop backs are included. Care to guess the most critical component? That would be the power strip, followed by the DAC power supply. Next we lifted the whole system on sets of three Minis and the power amp on a trio of Ultra SS. Then we played with three versus four supports in various positions, and Ultra SS in place of the Mini, to get a feel for relative performance as well as collective value. That got us as far as lunchtime -- and left us with plenty to discuss, the overriding conclusion being that there are two possible strategies for introducing the supports into the system: you can follow the signal from front to back or, more productively, you can follow the power from back to front. Each strategy offers its own balance of benefits, but the signal-based route tends to favor the hi-fi aspects of performance, while the power-based approach offers more fundamental, musically significant benefits.
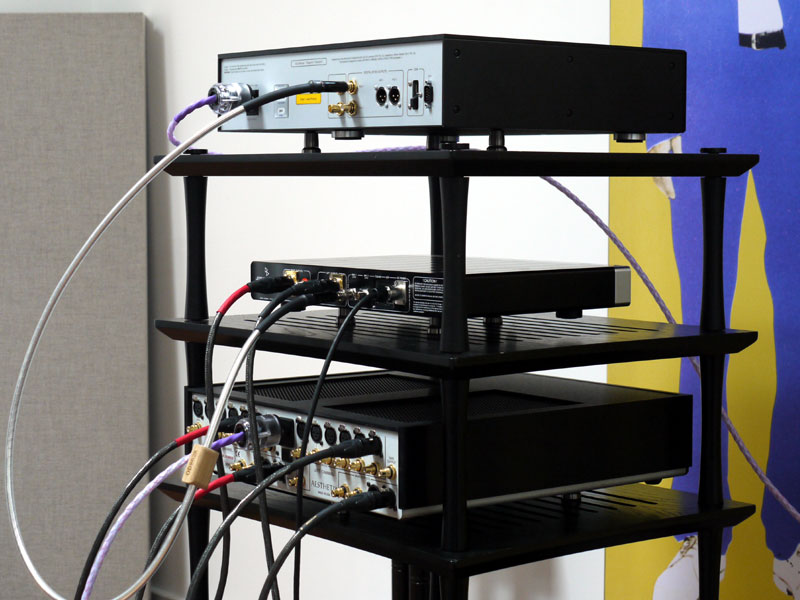
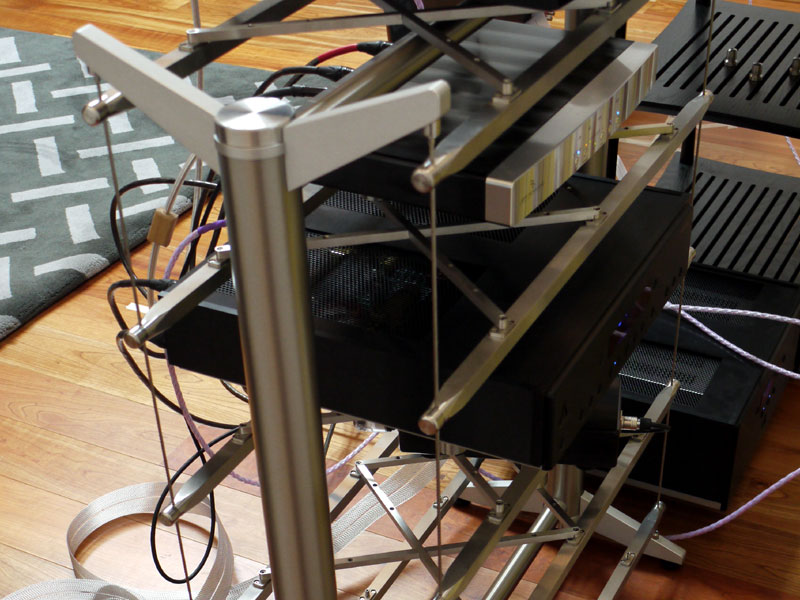
The ESS rack awaiting its labors.
Suitably refreshed, we returned to the fray, elevating the entire system on Ultra SS feet. The next step was a major one, moving the system onto the ESS rack, first supporting the units on the acrylic shelves, then adding the Ultra SS feet back into the equation. Each of these changes was made en masse, as by now we’d established an order of priority. Removing single sets of supports from individual points within the system chain allowed us to confirm that those priorities still applied, without starting each time from scratch.
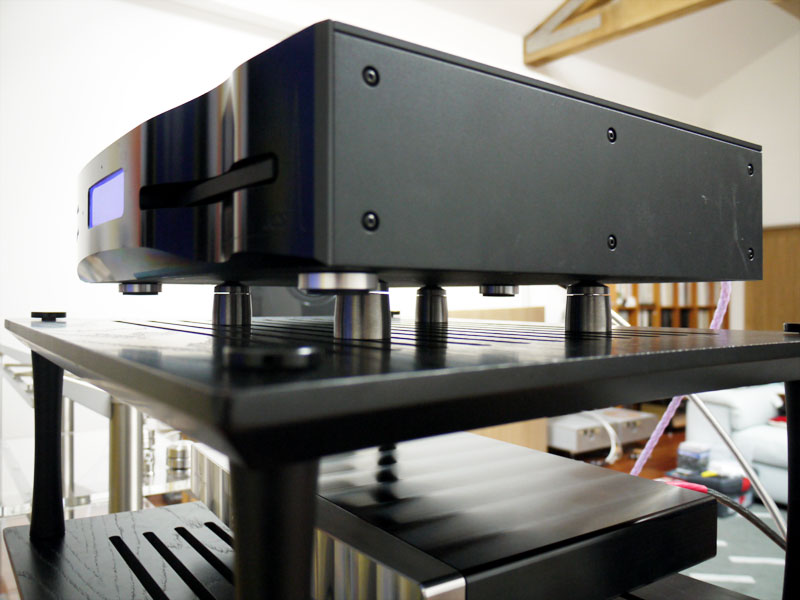
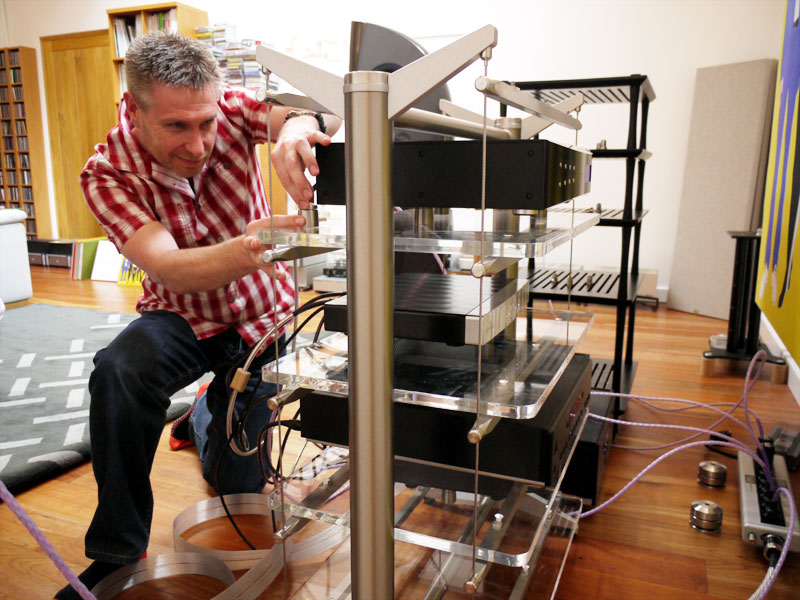
The ESS rack with the new Grid system installed.
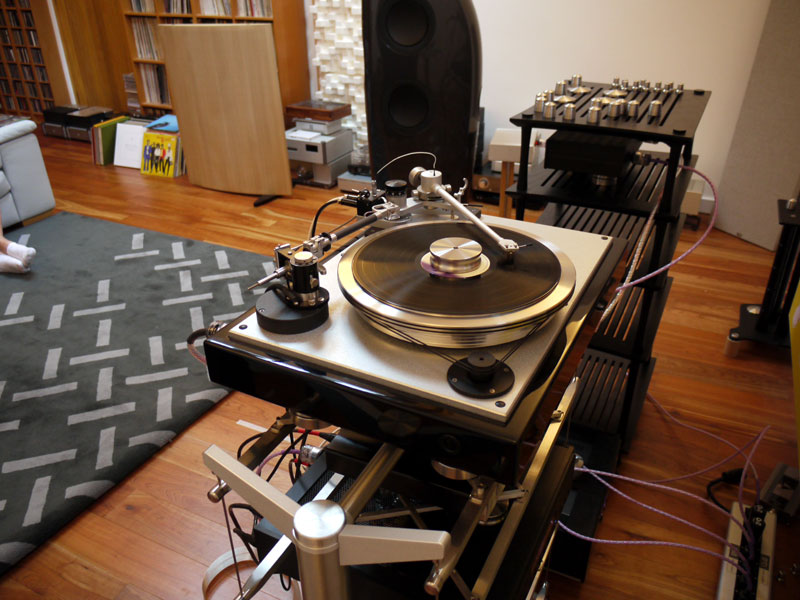
The next step was the one Paul and Fraser were waiting for. Paul had hand-carried the components for a new addition to the ESS rack -- the Grid support system. This can be used to replace the acrylic shelves of the ESS, a role once filled by the now-defunct Component Stand. The problem with that solution was that, whilst it was undoubtedly effective (I’ve used it under my various VPI turntables for the last four years or so), it also used up a lot of vertical space, especially if you put Ultras on top of the Component Stand. The Grid offers a low-profile alternative elegantly constructed from four identical parts that allows users to couple equipment directly to the technology pockets in the cross-bars, eliminating the acrylic shelf (and the resulting cross-material interface) in the process. First step was to install a Grid on the top level, complete with a trio of Ultra SS feet. Then the transport was shifted between the acrylic/Ultra SS level and the Grid/Ultra SS combination. Once we’d established the sonic impact of that shift, we started to replace the acrylic shelves one at a time, shifting each unit up a level in turn. With the whole system resting on a combination of Grids and Ultra SS feet, it was definitely time for another break. The next stage was to move up to the massive Ultra 5, again a step-by-step process, starting with the speakers and then the power strip, power amp and finally the electronics in the rack. This, finally, took us to the top of the Stillpoints tree. But it didn’t mark the end of the process. With everything now in place, it was time to look at not just how well the system was performing, but how wide we’d opened the window. Looking at the impact of other elements in the system (the Qv2s and Qx4s) quickly confirmed the "force multiplier" credentials of the Stillpoints components. I’m well used to the impact of the Quantum kit, what to expect from its inclusion, but what I got here was considerably more than that. Not only did the Stillpoints allow the core equipment to perform at its best, you could hear other benefits just as clearly. This brought on the final stage of the listening tests. One of the reasons I selected the Janus preamp was its inclusion of a decent phono stage, allowing us to add a record player to the mix without the complexity of an additional box (or two) of electronics. The first step was to install the VPI Classic in place of the dCS transport, its power supply placed on the Quadraspire rack, but supported on Ultra 5 feet. That was quite an ear-opener, but adding an additional two Ultra 5's to bring the support suite up to six was a real revelation. Likewise, the use of the LP Isolator record weight, last link in the complete Stillpoints chain (both on the record and as a chassis damper on the electronics), brought about an unexpected level of improvement. Eagle-eyed readers will notice the hole drilled through the LP Isolator that’s in use on the record player. This is the final response to the issues encountered with long spindles on turntables that can lift the standard LPI clear of the disc -- the Classic being a case in point. There are various fixes, but this is the ultimate solution -- not quite as pretty as the standard LPI but universal in its application. The LP Isolator VPI will be a standard option, with revised graphics missing from the prototype. Which finally answers all those, "How did you do that?" queries I received after the LP Isolator review appeared. Sorry guys, but I didn’t want to jump the gun before the final solution had been decided -- but now you know.
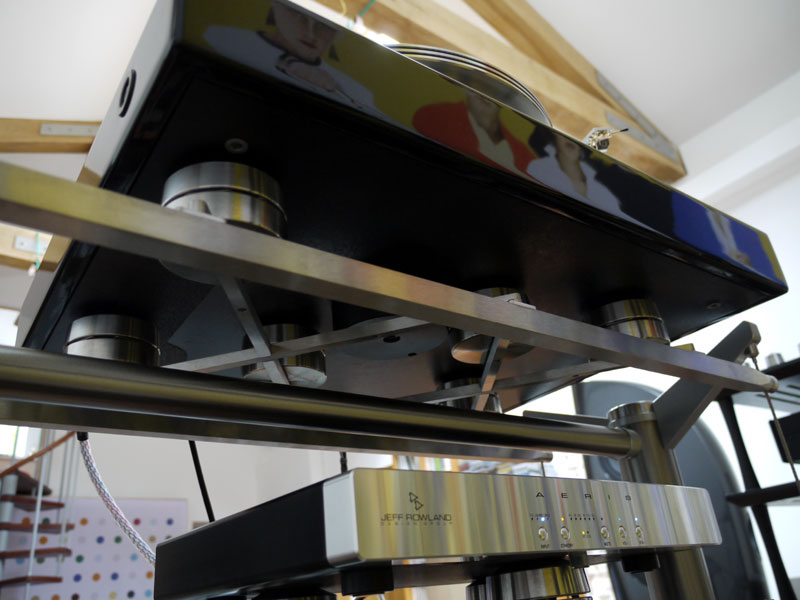
Stepping up to the Ultra 5s.
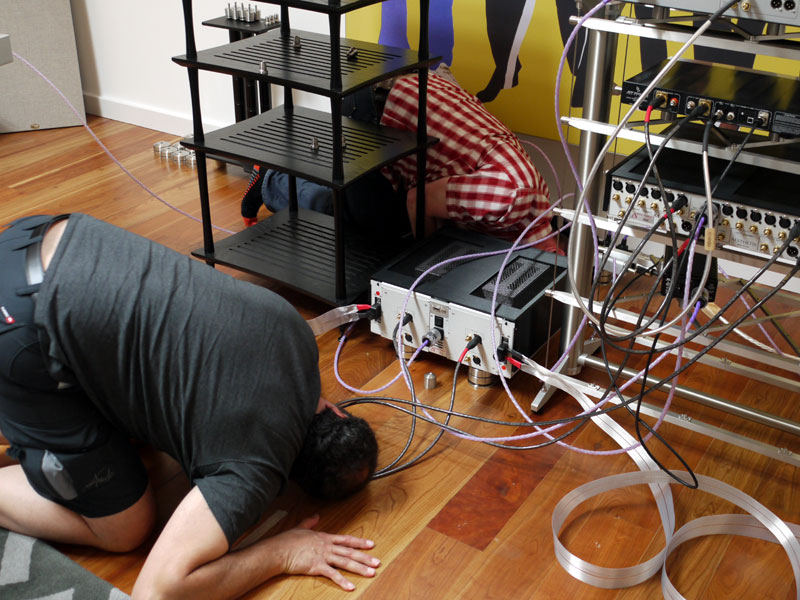
The other fascinating experiment we conducted was adding an Entreq Tellus grounding block to the system -- not just grounding the equipment, but also the rack itself, to remarkable effect. These apparently simple devices are astonishingly effective, easily applied and the subject of an upcoming review. Watch this space, because even those with a clean ground already installed will want to know about these. Those of you living in apartments -- just wait until you hear what these folksy-looking wooden blocks can do for you. . . .and get dirty!
ith everything installed and all the peripherals in place, at last we could actually sit back and enjoy the fruits of our labors -- except that by now it was getting seriously late in the day. A break for dinner and an extended listening session thereafter took us into the wee small hours, after what had been a very long and arduous day. As well as the formal ABA auditions, we’d also stopped at what might be considered natural breaks in the process to do some wider listening. For the structured tests, we’d found that female vocals -- particularly close harmony vocals -- provided almost instantaneous indicators of changes in system performance. The ability of a singer to communicate the emotional content of the lyric, as well as his or her own sense of natural identity and individual separation are telling indicators. After all, we all know what a human voice sounds like, and we’re familiar with its range of expression. But a full-range system needs to do more than just voice, so we also introduced orchestral, rock and jazz tracks to those way-stations along the route. The after-dinner listening included everything from Sly and Robbie to Talking Heads, Carl Davis to Ahmad Jamal -- with plenty of Elvis en route, including Costello and the outrageous Gary Glitter cover of "Suspicious Minds." Well, you’ve got to have some fun, haven’t you?
The Ultra 5 system.
A long, long day of lifting, leveling and lugging equipment, reversing steps repeatedly, is seriously hard work. For the sake of clarity, I haven’t included the various experiments made with different placement of the Stillpoints feet, or the use of the Ultra Bases -- broad discs that provide height-adjustment options on the Ultra SS and Ultra 5. I’ll get to those in the review proper, but here they just added additional permutations to the various steps we had to take. Throw in the concentration required for the listening tests as well as the fact that the hot-running high-end equipment employed was enclosed in a heavily insulated room -- along with a trio of large men -- and by the end of the exercise we were not in pristine condition. Make no mistake about it: sessions like this are mentally tiring and physically hard work -- and that’s if everything goes according to plan! So much of their success lies in the preparation -- and the provision of fail-safes that fortunately we didn’t need. And at the end of the exercise, where are we? Well, in the case of Fraser and Paul, the answer is a long way and lengthy drive from home. For me, I’m now in a position to start applying everything I’ve learnt to my main system, embarking on the review proper. I’ve established the landscape; now comes the painstaking process of adding all the detail to the outline map, safe in the knowledge that I won’t be making missteps or drawing false conclusions as a result of poor practice or sloppy implementation. I know how important numbers are; I know where the priorities lie, and I know about placement. I can describe an overall strategy, and I can relate the role of the ESS to the other elements in the system. Now I need to take that knowledge and apply it to my main system, as well as a few variations on that theme, to confirm its consistency and be able to describe the benefits in detail and in the round. Note also how one review overlaps with another. The inclusion of the Entreq Tellus will inform that review as well as the one on the Stillpoints, revealing yet another way in which that technology can be applied. It underlines the interlocking and dialectical nature of the review process. Even when the review is written and published, we go on learning about the unit in question, in different systems and surrounded by different ancillaries. Hopefully, if nothing else, then this account will cause anybody who believes that reviewing is easy or that reviews are definitive to reconsider their thinking.
The Stillpoints are a carefully considered and logically structured product line that attacks a clearly defined problem with equally clear results; would that it were always so. You can’t listen to a product -- you can only listen to a system, which in some cases makes reaching conclusions a bit like nailing jello to the ceiling. The Stillpoints offer a closed solution to a single question. Believe it or not, they are as easy as it gets. But that still leaves the clearing up: rebuilding,
rewiring and retuning the main system. All totaled, the Stillpoints exercise has consumed
half a day of initial setup, a day of settling in and warming up, a long day of intensive
listening and another half day just to dismantle the rig and reconstitute the main system
-- which will then also need at least a day to bed in. That was digging the foundations.
As I said, now I can start on building the review proper. |